As you know, there is no wizard for installing Nano Server, like Windows Server and Server Core. You install it by creating a Virtual Hard Disk (VHD or VHDX), from the PowerShell command line. After that, you use the VHD or VHDX to create a Hyper-V virtual machine or a boot drive for a physical server.
If you look at the Windows Server 2016 directory on its installation disk or image file, you will see folders that support us to create and edit Nano Server images (a PowerShell module in NanoServerImageGenerator folder, a subdirectory containing the package files for the roles and features the operating system supports, and the Nano Server image).

Figure 1. NanoServer folder in the Windows Server 2016 installation disk
Create a Nano Server image
Import Nano Server Powershell module
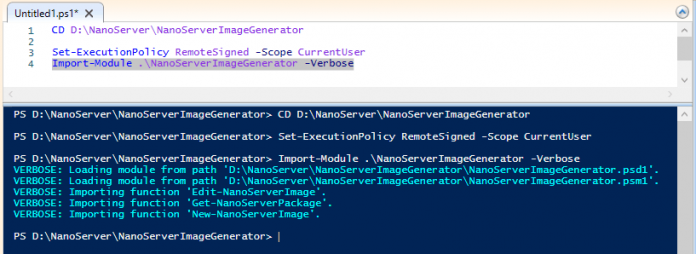
Open Windows PowerShell with administrative privileges (run as administrator). Navigate to the NanoServerImageGenerator folder on the installation disk (In this case, it is mounted as D: drive) and import the Windows PowerShell module required to provide the cmdlets for Nano Server.
CD D:\NanoServer\NanoServerImageGenerator
Set-ExecutionPolicy RemoteSigned -Scope CurrentUser
Import-Module .\NanoServerImageGenerator -Verbose
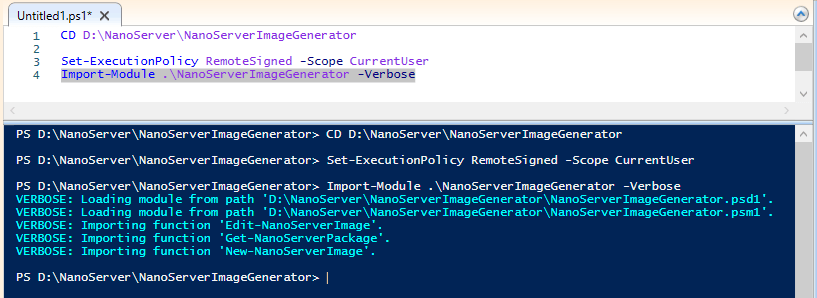
Figure 2. The output of the Import of NanoServer PowerShell module.
New-NanoServerImage cmdlet
Run the New-NanoServerImage cmdlet.
New-NanoServerImage -DeploymentType Guest -Edition Standard -MediaPath D:\ -TargetPath C:\Temp\NanoServer1.vhdx -ComputerName NanoServer1
- DeploymentType Specifies whether the image file is used on a Hyper-V virtual machine (Guest) or a physical server (Host).
- Edition Specifies whether to install the Standard or Datacenter edition of Nano Server.
- MediaPath Specifies the path to the root of the Windows Server 2016 installation disk. or mounted image.\
- TargetPath Species the full path and filename of the new image to be created. The filename extension (.vhd or .vhdx) specifies whether the new image should be Generation 1 or Generation 2.
- ComputerName Specifies the computer name that should be assigned to the new image.
When the cmdlet runs, it will prompt you for a password that is applied to the Administrator account in the Nano Server image.

Figure 3. Enter a password that is applied to the Administrator account.
Note:
You will need to keep this password for logging on the server later.
It takes around two or three minutes to complete the process. The output generated as shown below:

Figure 4. The output of the New-NanoServerImage cmdlet.


