Logging on to a Nano Server
Once you have deployed the VHDX image in a VM and started it. Now it’s time to log on and configure the basic settings of the VM. Previously, we deployed a Nano server with non-domain joined VM, so we just need to enter username and password. See the previous post, Deploying a nano server, for more information.

Figure 1. Logging on a Nano Server
After logging on the Nano Server, we will see there are only the minimal controls from Nano Server console that we might need to configure the server like the network interfaces, Windows Firewall rules, and Windows remote Management (WinRM) (See
figure 2. Basic configuration). We will go through each configuration in this article.

Figure 2. Basic configuration
Configuring a Nano Server IP address
By default, the Nano Server obtains an IP address from DHCP server on your network and configure the system’s network adapter. However, we can configure the network adapter manually by using either Nano Server Recovery Console or the New-NanoServerImage command line which you used to created a Nano Server from previous article, Deploying a nano server. In this article, we will manually configure the network adapter to use a static IP address from the Nano Server Recovery Console use the following procedure:
-
Select the Networking item and press Enter.

-
On the Network Settings screen, select network adapter and hit Enter

-
Press F11 to configure the IPv4 Settings for the adapter.

-
Press F4 to toggle the DHCP client to Disabled

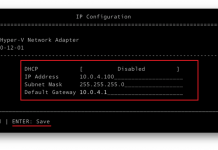
- Use the Tab key to enter the IP Address (for example: 10.0.4.100), Subnet Mask (for example: 255.255.255.0), and Default Gateway (for example: 10.0.4.1).
-
Press Enter to save your settings. Press Enter again to confirm then continue to press Esc few times to return to the Nano Server Recovery Console.

Configuring Firewall rules
From the Nano Server Recovery Console screen, select the Inbound Firewall Rules or Outbound Firewall Rules, all the default rules on the system will display as below.

Figure 3. Inbound Firewall rules

Figure 4. Outbound Firewall Rules
The above screens only support you to activate or deactivate an existing rule by using F4 key, you cannot modify rules themselves or create new ones. Once we have remote access to the Nano Server, we can use standard tools, such as the Windows Firewall with Advanced Security console, to manage all other settings.
Configuring Windows Remote Management
From Nano Server Recovery Console screen, there is only one function that provide the ability to reset the WinRM service and firewall to their default settings, in the event that we did something wrongs and cannot remote the server.

Figure 5. Reset the WinRM firewall and service configuration to default

Figure 6. Confirm resetting of WinRM
Connecting to a Nano Server using PowerShell
Now the server is ready to connect/remote in. The following PowerShell cmdlet will allow us to connect to the server.
new-pssession -computername name -credential domain\username


