Optional parameters of the NewNanoServerImage cmdlet
There are also optional parameters for the NewNanoServerImage cmdlet (See more at https://docs.microsoft.com/en-us/powershell/module/nanoserverimagegenerator/new-nanoserverimage?view=win10-ps) that we can use to install additional packages provided with Nano Server. Some examples are shown below:
- Compute Installs the Hyper-V role on the image specified by the TargetPath variable.
- Clustering Installs the Failover Clustering role on the image specified by the TargetPath variable.
- OEMDrivers Add the basic drivers included in Server Core to the image specified by the TargetPath variable.
- Storage Installs the File Server role and other storage components on the image specified by the TargetPath variable.
- Defender Installs Windows Defender on the image specified by the TargetPath variable.
- Containers Installs host support for Windows Containers on the image specified by the TargetPath variable.
-
Packages Installs one or more Nano Center packages from among the following:
- MicrosoftNanoServerDSCPackage Installs the Desired State Configuration (DSC) package on the image specified by the TargetPath variable.
- MicrosoftNanoServerDNSPackage Installs the DNS Server role on the image specified by the TargetPath variable.
- Microsoft-NanoServer-IIS-Package Installs the IIS role on the image specified by the TargetPath variable.
- Microsoft-NanoServer-SCVMM-Package Installs the System Center Virtual Machine Manager agent on the image specified by the TargetPath variable.
- Microsoft-NanoServer-SCVMM-Compute-Package Installs the Hyper-V role on the image specified by the TargetPath variable, so that is it manageable with System Center Virtual Machine Manager. Do not use with the Compute parameter.
- Microsoft-NanoServer-NPDS-Package Installs the Network Performance Diagnostics Service on the image specified by the TargetPath variable.
- Microsoft-NanoServer-DCB-Package Installs Data Center Bridging on the image specified by the TargetPath variable.
- Microsoft-NanoServer-SecureStartup-Package Installs Secure Startup on the image specified by the TargetPath variable.
- Microsoft-NanoServer-ShieldedVM-Package Installs the Shielded Virtual Machine package on the image specified by the TargetPath variable (Datacenter edition only).
Joining a Domain
When creating a new Nano Server image, there is a DomainName parameter that you can use to create a new Nano Server image that is a member of a domain. This is an offline domain join.
New-NanoServerImage -DeploymentType Guest -Edition Standard -MediaPath D:\ -TargetPath C:\Temp\NanoServer2.vhdx -ComputerName NanoServer2 -DomainName Eagle
However, to perform the offline join domain with above cmdlet, you must have access to the domain the Nano Server joins so that you can harvest a domain provisioning file (called a blob) and apply it to the newly created VHD/VHDX file. Also, you have to use a computer that is a member of the domain to run the New-NanoServerImage cmdlet. If you are creating the image on a computer that is not a member of the domain the Nana Server joins, you can use the DomainBlobPath parameter when you run the New-NanoServerImage cmdlet.
To obtain the blob file and copy it over to the computer you are creating a new Nano Server image, you can use the Djoin.exe tool included with Windows server 2016 by using the following syntax:
Djoin /Provision /Domain Eagle /Machine NanoServer3 /Savefile NanoServer3BLOB.txt
Then copy the BLOB file NanoServer3BLOB.txt to the computer where you create the new Nano Server image and run the New-NanoServerImage cmdlet with DomainBlobPath parameter
New-NanoServerImage -DeploymentType Guest -Edition Standard -MediaPath D:\ -TargetPath C:\Temp\NanoServer3.vhdx -ComputerName NanoServer3 -DomainBlobPath C:\Temp\NanoServer3BLOB.txt
Creating a Nano Server VM
After we have the Nano Server VHD/VHDX image, we can proceed to deploy it by using either PowerShell or Hyper-V Manager.
With PowerShell option, there are two parameters you should pay attention. The VHDPath parameter specifies the name and location of the Nano Server image file and the Generation parameter specifies which Generation of the VM you are creating. If the Nano server image file is VHD, then you have to specify a Generation 1 VM and if it is VHDX, then be sure to specify a Generation 2 VM.
New-VM -Name “NanoServer” -Generation 2 -MemoryStartupBytes 2GB -VHDPath “C:\Temp\NanoServer1.vhdx”

Figure 5. The output of the New-VM cmdlet

Figure 6. A new Nano Server created in Hyper-V
You can also use Hyper-V Manager to create the VM. At the Connect Virtual Hard Disk step, select the Use an Existing Virtual Hard Disk option.
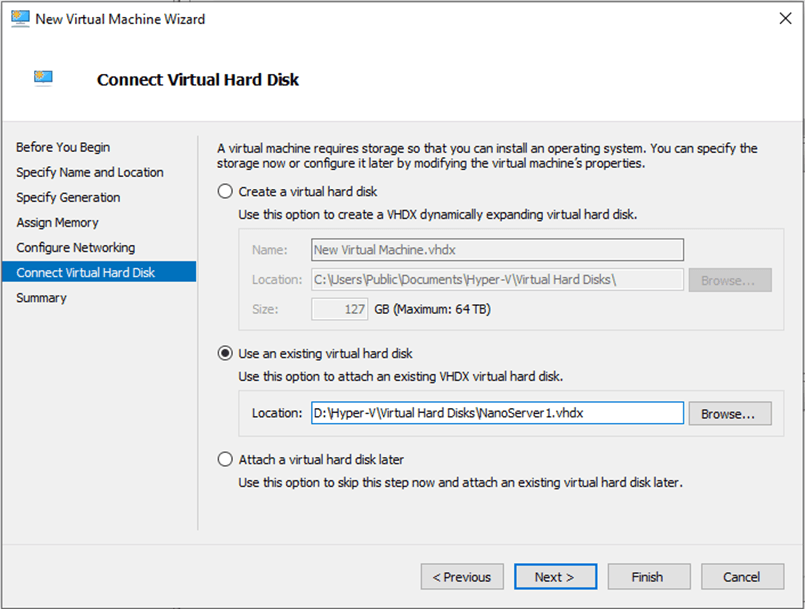
Figure 7. Select the Use an Existing Virtual Hard Disk option.
Logging on to a Nano Server
Now we can turn the Nano Server on from Hyper-V Manager. Once it started, a simple screen appears which is a character-based authentication screen. As shown below:
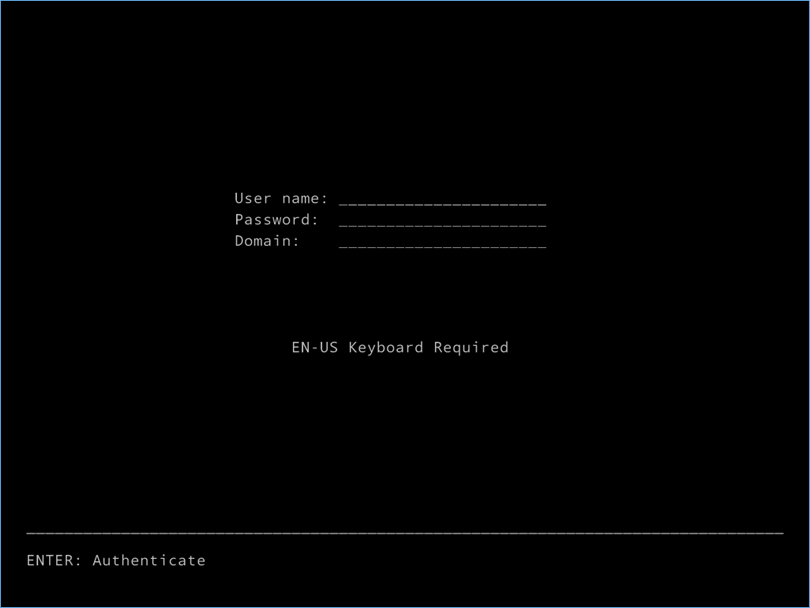
Enter the user name as Administrator and password is the password you enter when you run the New-NanoServerImage at step Create a Nano Server image (See Figure 3). Once you logged on, you will see the Nano Server Recovery Console as shown below.
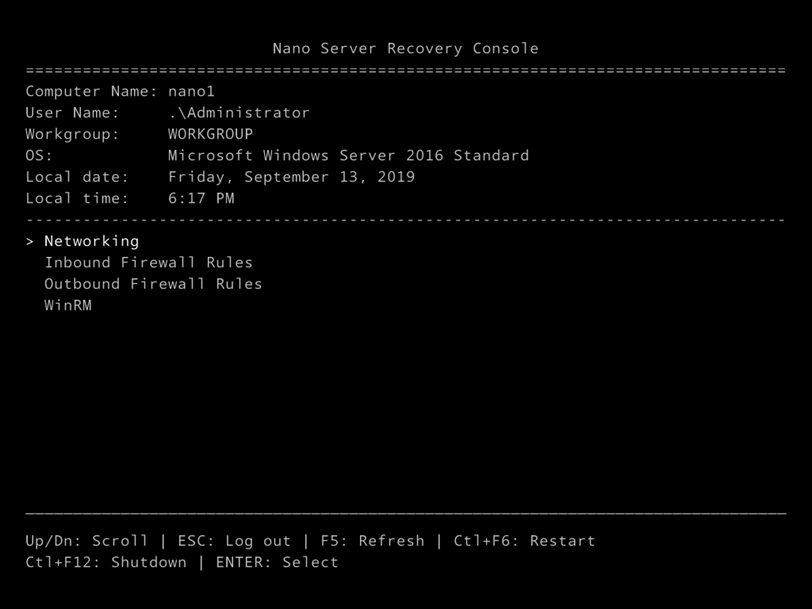
With the Nano Server Recovery Console, we only have minimal controls to configure the system. After we complete the basic configurations of the server and it is ready to listen for calls from remote management tools, there is nothing more to do from here. There are some basic configurations we can do are network interfaces, Windows Firewall rules, Windows remote management… and they will be posted in the next article.


